One such option involves selecting text and editing it so that it appears in a smaller font, below the text baseline. This is called subscript and is popular for a lot of document editors. Our guide below will show you how to do subscript in Google Docs if you need to alter some of the text in your document in that manner.
How to Use Google Docs Subscript Formatting
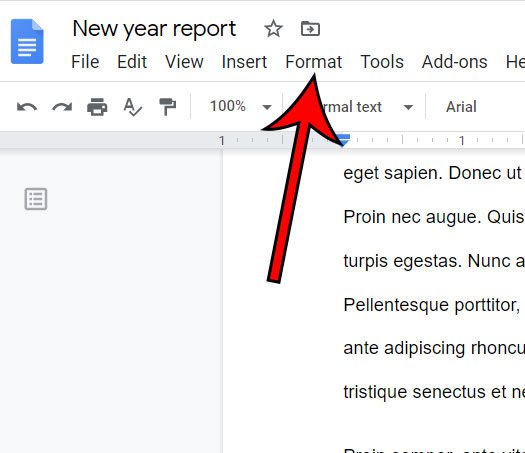
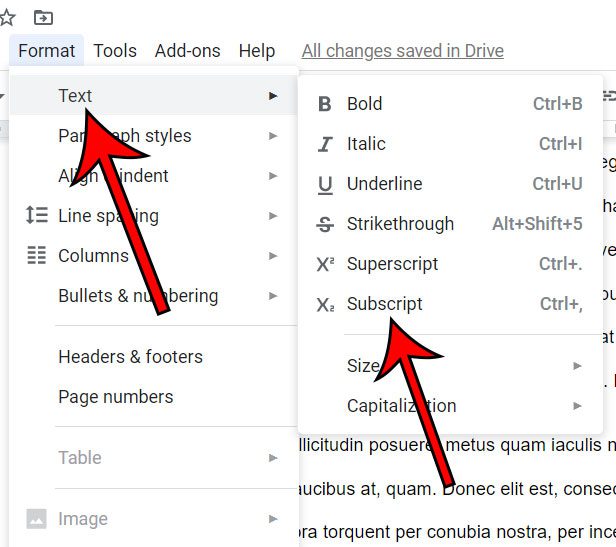
Our guide continues below with additional information on adding subscript in Google Docs, including pictures of these steps. Properly formatting text is an important element in creating a document that is informative and easy for your readers to consume. Some of these formatting options are easy to find and use in Google Docs, like many of the various options for spacing in Google Docs, while others might be a little trickier. One formatting task that you may be curious about is how to subscript in Google Docs. Google Docs provides many of the formatting options that you may need to apply to the content in your document, and one of those is called “subscript”. Text with subscript formatting will appear “below” your other text, as its center line is lowered relative to normal text. You can learn how to type subscript in Google Docs by selecting the text, clicking the Format tab, choosing Text, then selecting Subscript. While certain formatting options like bold, italics, and underline are easily found in the toolbar above the document, other options, like subscript, may not be as easy to locate. But learning how to write subscript in Google Docs only requires you to select some of the text in your document (or position your cursor where you want to type the new subscript text) and then find the correct option on the Formatting menu. Fortunately, there are a number of additional text formatting options in the “Format” menu at the top of the window. Our guide below is going to show you how to use this menu so that you can apply subscript formatting to some of the text in your document. Our Google Docs clear formatting tutorial can show you a simple way to remove all of the formatting from a selection in your document.
How to Subscript in Google Docs (Guide with Pictures)
The steps in this tutorial were performed in the desktop version of the Google Chrome Web browser, but will also work in other desktop browsers like Firefox or Microsoft Edge. The steps above outline how to use subscript in Google Docs by either selecting existing text that you wish to turn into subscript, or by clicking at the point in the document where you wish to start typing subscript text. While this method uses the “Format” menu, there is another way to apply subscript in your document.
Method 2 – How to Create Subscript Text in Google Docs
While the first method in this article focuses on using subscript as a formatting option, you can also insert text as subscript instead. If you are trying to learn how to write a subscript in Google Docs rather than changing existing text to a subscript, then this section will show you what to do.
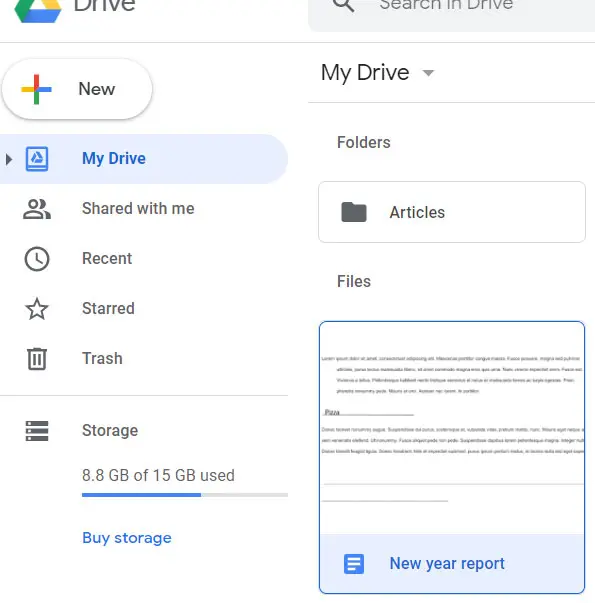
Step 1: Open your document.
Step 2: Choose where in the document you wish to add the subscript text.
Step 3: Click Insert.
Step 4: Select Special characters.
Step 5: Click the Arrows button and choose the Subscript option.
Step 6: Choose the subscript character to insert.
Now that you know how to do subscript in Google Docs either from the Format menu or with the help of special characters, then you will be able to easily create that type of text in future documents. This special character drop down menu with all of these special symbols can also come in handy when you are writing technical articles that require things like mathematical or scientific symbols that you can’t type on a keyboard. Our article continues below with some additional questions that you might have about how to do subscripts in Google Docs. If you use Microsoft Outlook to manage your email account, then our Outlook strikethrough shortcut tutorial will show you how to apply some different types of formatting to your emails, too.
How to Do Subscript in Google Docs Mobile
If you use the Google Docs app on your iPhone, then you have probably discovered that it’s a surprisingly good way to edit documents. You can use many of the same features that you find in the desktop version of Google Docs, including the option to apply subscript formatting. Our steps below use the iPhone version of the Google Docs app, but these steps are nearly identical on the Docs app for Android devices.
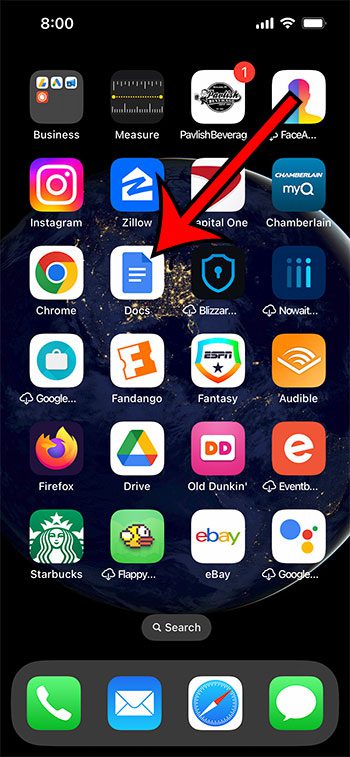
Step 1: Open the Google Docs app on your iPhone.
Step 2: Open your document or create a new one.
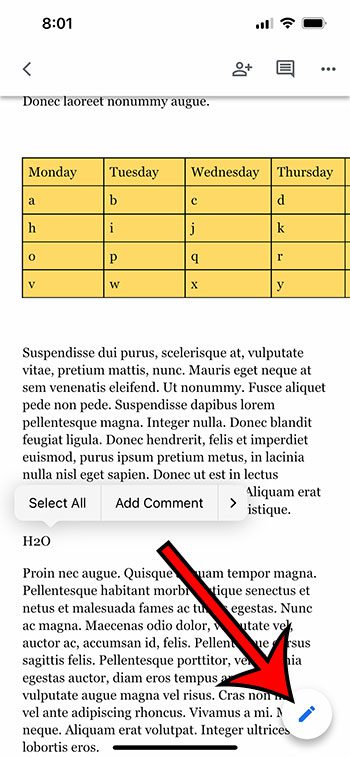
Step 3: Touch the pencil icon at the bottom-right corner of the screen.
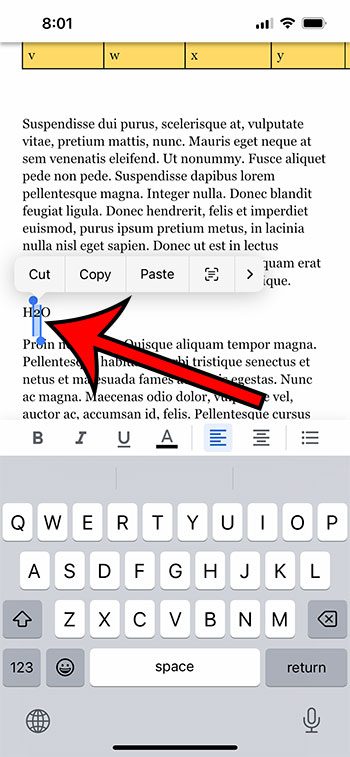
Step 4; Highlight the text that you want to make subscript.
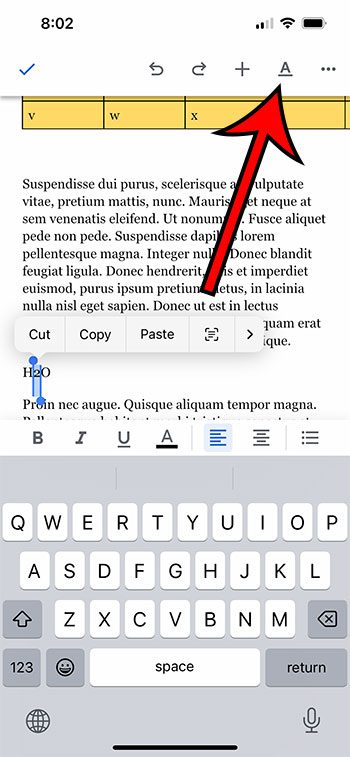
Step 5: Touch the A button at the top of the screen.
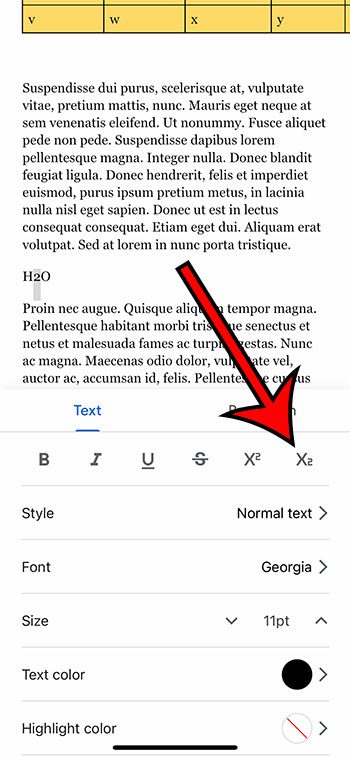
Step 6: Tap the X2 button in the toolbar to apply the subscript formatting.
Now that you know how to do subscript in the Google Docs iPhone app, you can use a similar technique when you want to apply other types of Google Docs document formatting on your phone.
More Information on How to Use Superscript or Subscript in Google Docs
If you are trying to use subscript or superscript in Google Docs, the method is essentially the same, and both of the methods that we have discussed in our tutorial above will apply. The only difference between superscript and subscript is how they look in the document. Creating or formatting either of them is effectively the same. You can also use these steps if you have text with the subscript format that you would like to change to regular text. If you have text selected, then this will apply superscript to that text. If nothing is selected, then the next text you type will be in the superscript format. You can also use the keyboard shortcut of Ctrl + . to switch to superscript mode. As we mentioned above, the keyboard shortcuts for superscript and subscript are Ctrl + . and Ctrl + , respectively. You can use these keyboard shortcuts if you press Ctrl on your keyboard and hold it down, then press the other key at the same time. The special characters menu that you use in the second method above has a lot of other useful characters that you might need to add to a document, especially if you are working on things like chemical formulas or mathematical equations, where the ability to add subscript is necessary. These extra special characters include things like a copyright symbol, math characters, musical notes, and much more. While I typically prefer using the Format method in the menu bar to apply superscript or subscript to a document, the extra items found via the special characters window on the Insert menu can make it more appealing for some users. Sharing files in Google Docs, Slides or Sheets lets you give other people access to the files, which can be useful when working in a group, or when you want someone to proofread your work.
How to Do Subscript in Google Slides
While the steps above have provided you with information on how to put subscript in Google Docs, you may be curious about applying that type of formatting to content in a slide in your presentation. Luckily the way that you put superscript or subscript in Google Slides is very similar to how to put little numbers above words in Google Docs or below those words. Just as when you were learning how to put a subscript in Google Docs, you can also use the Ctrl + . (superscript) and the Ctrl + , (subscript) keyboard shortcuts to use that formatting in your Google Slides. Google has a bunch of other tools, too. For example, you can create your own website on Google with the Google Sites editor.
After receiving his Bachelor’s and Master’s degrees in Computer Science he spent several years working in IT management for small businesses. However, he now works full time writing content online and creating websites. His main writing topics include iPhones, Microsoft Office, Google Apps, Android, and Photoshop, but he has also written about many other tech topics as well. Read his full bio here.
You may opt out at any time. Read our Privacy Policy
