Configure iCloud on a Windows PC With the iCloud Control Panel
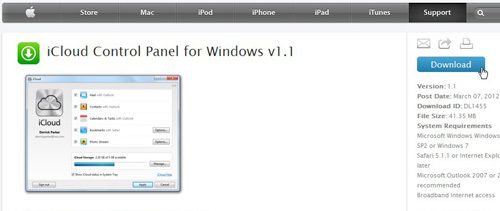
In order to allow Windows users to work with with iCloud from the PC, Apple offers a free program called the iCloud Control Panel that allows you to configure iCloud on a Windows PC. This program can be downloaded directly from Apple’s website, specifically from this link, and then it can be set up on your Windows PC. To get started, you will need to go to the link above and click the blue Download button at the right side of the window, then save the file to your computer. The file is 41 MB in size, so the download may take a while if you do not have a very fast Internet connection.
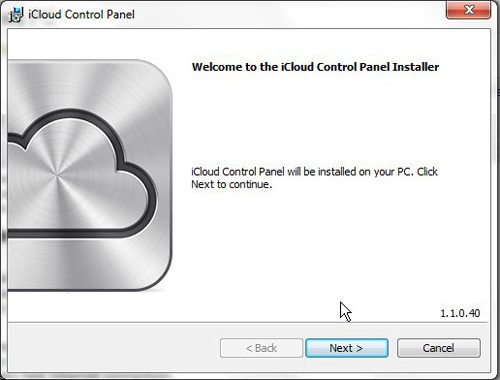
Once the download has completed, double-click the downloaded file to begin the installation, then follow the on-screen prompts until the installation has been completed. The installation should only take a minute or two, depending upon the speed of your computer.
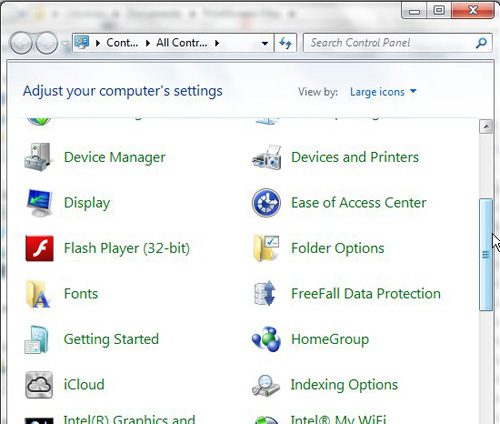
The next step is where a lot of people may run into some problems when they attempt to configure iCloud on a Windows PC. iCloud is not listed on the All Programs menu like most of the other programs that you install from the Internet. It is actually listed in the Control Panel, so that is where you will need to go to configure iCloud on a Windows PC.
Once you have located the iCloud icon in the Control Panel, you can double-click the icon to configure iCloud on a Windows PC. To get the view shown in the image above, you need to click the drop-down menu to the right of View by, then click the Large Icons option. After you have double-clicked the iCloud icon, you will be shown the screen below.
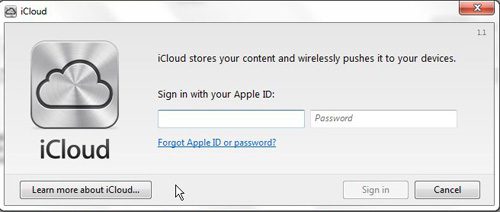
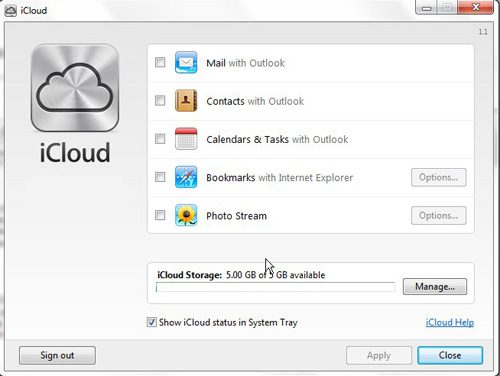
Type your Apple ID and password into their respective fields, then click the Sign In button. This will display the image below
From this window you can configure iCloud on a Windows PC by selecting the items that you want to sync with iCloud. Note the 5 GB of storage indicated at the bottom of the window, which is the default amount included with free iCloud accounts. You can either figure out a way to work with this amount of space, or you can purchase additional storage by clicking the Manage button, then clicking the Buy More Storage button on the next screen. To learn more about ways that you can configure iTunes, read this article. After receiving his Bachelor’s and Master’s degrees in Computer Science he spent several years working in IT management for small businesses. However, he now works full time writing content online and creating websites. His main writing topics include iPhones, Microsoft Office, Google Apps, Android, and Photoshop, but he has also written about many other tech topics as well. Read his full bio here.
You may opt out at any time. Read our Privacy Policy