One way that you can improve the grammar in your writing is with the help of the spelling and grammar checker tool in Microsoft Word. Our article below will show you how to check your grammar in Word using the tool built into the application.
How to Do a Grammar Check in Word 2010
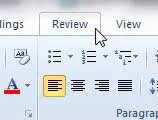
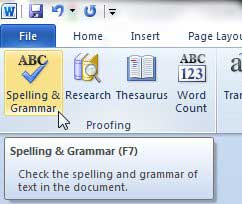
Our guide continues below with more information on checking spelling and grammar in a Microsoft Word document, including pictures of these steps. Having the ability to scan a document and look for spelling or grammatical mistakes can save you a lot of hassle? But if you are asking the question “how do I do a grammar check on Word?” then it’s very likely that you are having trouble finding that tool within the application. Word 2010 is a powerful word-processing program not only because of the different ways that you can customize a document but also because of the utilities that you can use to check the contents of that document. You might be aware of the spell-check feature, which has become a common part of most data-entry programs, but you might not be aware that Word can also check the grammar of the text in your documents. You can have Word check grammar automatically and check spelling automatically by opening your document, selecting the Review tab, clicking Spelling & Grammar, then choosing what to do with the mistakes it has found. This can be a particularly helpful tool if you are prone to making common grammatical mistakes or if you are submitting the document to a client or teacher who may be grading the quality of your work. Continue reading to learn how to do a grammar check in Word 2010.
How to Run the Spelling & Grammar Tool in Word 2010 (Guide with Pictures)
One of the best parts of the spelling and grammar checker in Word 2010 is the level to which it can be customized. While the tool itself is run directly within the Word 2010 interface, you actually need to open the Word Options menu from the File tab to configure the grammar settings. After we show you how to perform a grammar check in Word 2010, we will then show you where to go to configure the grammar options as well. Now that you know how ot use the spelling and grammar checker in Microsoft Word you will be able to scan the documents that you write and fix any mistakes that you find. You can also elect to ignore the mistake if you so choose. Note the Options button at the bottom of the window. If Word finds a mistake in your document, then you can click this button to set the options for the utility. Otherwise, you will need to follow the directions below to configure the grammar checker.
Changing the Grammar Checker Settings in Word 2010
While the spelling and grammar check in Microsoft Word will be able to find spelling errors and grammatical errors become you make any changes to the settings, it’s likely that you will discover it is either catching or missing some grammar errors. Fortunately, you can adjust the grammar checking for the application with the following steps.
Step 1: Click the File tab at the top of the window.
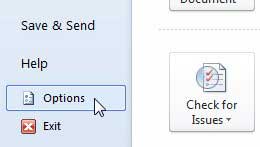
Step 2: Click Options in the column at the left side of the window.
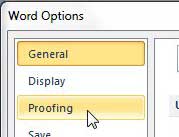
Step 3: Click Proofing in the column at the left side of the Word Options window.
Step 4: Locate the When correcting spelling and grammar in Word section.
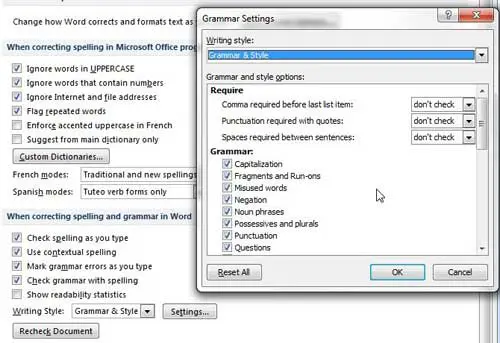
Step 5: Click the Settings button to the right of Writing Style, then check the items for which you want the grammar utility to check.
Step 6: Click the OK button at the bottom of the Grammar Settings window, then click the OK button at the bottom of the Word Options window.
Our tutorial continues below with more information on how you can change the way that Microsoft Word will find and mark grammar errors in your document.
More Information on Using the Microsoft Word Grammar and Spelling Checker to Find Spelling or Grammar Issues
When you have configured Word to perform automatic spelling and grammar checking, you will start to see an underlined word with a red squiggly line when it has found a spelling error or a grammar error. You can then click on that underlined word and use one of the suggested words to replace the misspelled word or make an adjustment to correct the grammatical error. If the document is going to be submitted in an official capacity, such as to your school or for work, then you might want to hide spelling errors and hide grammar errors that the automatic spell checking tool has found. This assumes that you have either chosen not to act on the suggestions from the tool, or you are going to be waiting until later to fix them. You can go to File > Options > Proofing > then go to the Exceptions for section and check the boxes next to Hide grammar errors in this document only and Hide spelling errors in this document only if you don’t want Word to highlight any potential spelling errors or potential grammatical errors when someone is viewing the file. When you click the Review tab at the top of the window you will see the option to check spelling and turn automatic spelling and automatic grammar checking on, but you will also find ways to work with comments and change tracking. These are other editing options that you can find useful when collaborating on a document with a group, as it can otherwise be difficult to identify the changes that someone makes.
Conclusion
Hopefully, this article has provided you with more information on how you can check spelling and grammar in your documents. Click the File tab, then select the Options button at the bottom-left of the window. Select the Proofing tab on the Word Options window, then adjust the settings and options on that menu. If you click the Settings button next to the Writing Style dropdown menu in the When correcting spelling and grammar in Word section you will find dozens of different options that you can adjust. This Grammar Settings dialog box can be really useful, especially if there is a particular type of mistake you always make and want to ensure that Word includes it when it checks your documents. Go to the Review tab, then click the down arrow to the right of Spelling and Grammar. You can then click the Spelling and Grammar option to choose that type of scan. You can then check the boxes to the left of:– Check spelling as you type– Mark grammar errors as you type In the When correcting spelling and grammar in Word section. Familiarizing yourself with the grammar dialog box so that you can change how Word detects grammar mistakes and chooses to correct spelling will give you more control over how the program handles potential errors. Not everyone needs the same thing from the editing tools, and your field or situation could dictate a different set of proofreading rules that you can customize in your Word installation.
Additional Sources
After receiving his Bachelor’s and Master’s degrees in Computer Science he spent several years working in IT management for small businesses. However, he now works full time writing content online and creating websites. His main writing topics include iPhones, Microsoft Office, Google Apps, Android, and Photoshop, but he has also written about many other tech topics as well. Read his full bio here.
You may opt out at any time. Read our Privacy Policy