Authorize a Computer in iTunes for Windows
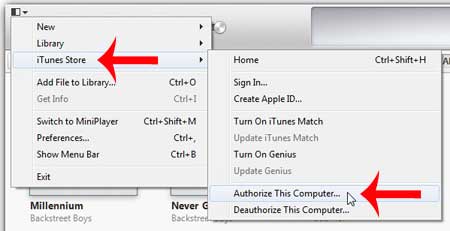
Note that you can only authorize up to 5 computers for one Apple ID. If you reach that maximum number of computers, then you will need to deauthorize one of the previously authorized computers in order to use your Apple ID on a new computer. The option to deauthorize a computer is located directly below the option to authorize a computer that we will using in the tutorial below. Step 1: Launch iTunes. Step 2: Click the iTunes menu at the top-left corner of the iTunes window.
Step 3: Select the iTunes Store option, then click Authorize this Computer.
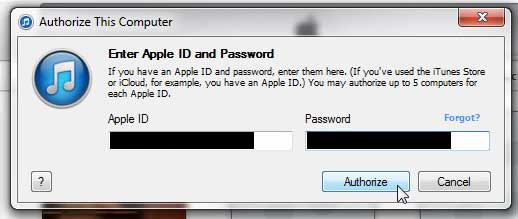
Step 4: Enter the email address and password for your Apple ID, then click the Authorize button.
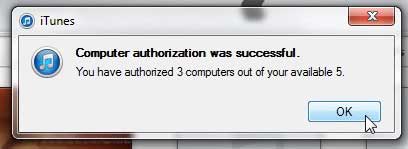
After a couple seconds you should see an image like the one below to let you know that the computer has been authorized, as well as the number of authorizations that you have used.
If you have already reached the maximum number of authorizations, then you will either need to deauthorize all of your computers from the computer that you are currently on, or you will need to specifically deauthorize a single computer by signing into iTunes on that computer and selecting the Deauthorize this Computer option. Do you have an .m4a file that you need to get into the .mp3 format? Read this article to learn how you can do that in iTunes. After receiving his Bachelor’s and Master’s degrees in Computer Science he spent several years working in IT management for small businesses. However, he now works full time writing content online and creating websites. His main writing topics include iPhones, Microsoft Office, Google Apps, Android, and Photoshop, but he has also written about many other tech topics as well. Read his full bio here.
You may opt out at any time. Read our Privacy Policy


