Fortunately the header in Excel 2013 is an editable region of the document, and it can be modified in a manner similar to how it was originally created. Our guide below will walk you through the steps needed to change or edit an existing header in an Excel spreadsheet.
How to Add, Remove, or Change Information in the Header of an Excel 2013 Worksheet
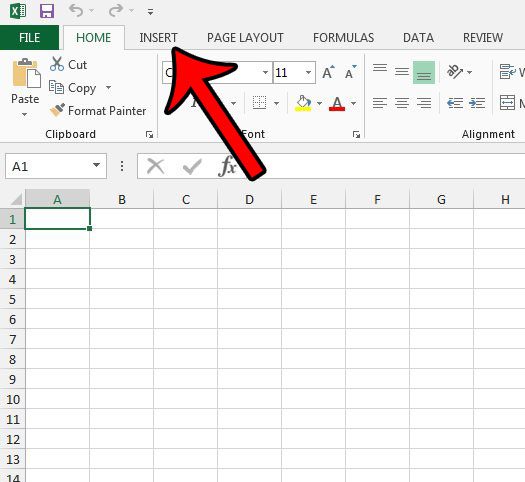
The steps below will assume that you have an existing Excel 2013 spreadsheet, and that you would like to modify some of the information contained within the header of that worksheet. We will be changing an existing title in the header with the guide below, but the principle is the same for other types of edits as well. Step 1: Open the worksheet in Excel 2013. Step 2: Click the Insert tab at the top of the window.
Step 3: Click the Header & Footer button in the Text section of the ribbon.
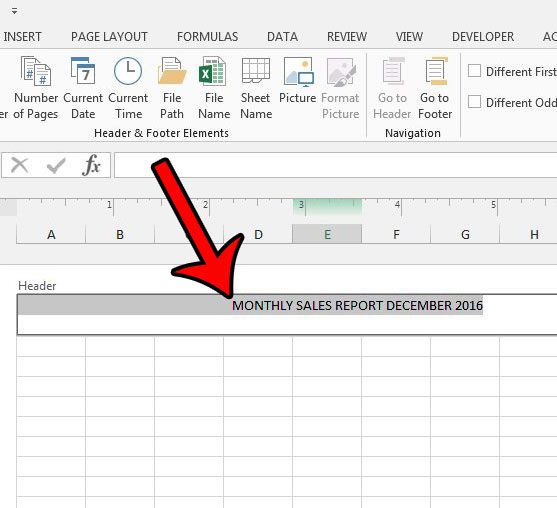
Step 4: Click inside the Header field at the top of the spreadsheet.
Step 5: Edit the existing header as needed.
You can then click any of the cells on the spreadsheet to exit the Header and Footer editing mode. Read this article to see how to return to normal view in Excel 2013 once you have finished editing the header. After receiving his Bachelor’s and Master’s degrees in Computer Science he spent several years working in IT management for small businesses. However, he now works full time writing content online and creating websites. His main writing topics include iPhones, Microsoft Office, Google Apps, Android, and Photoshop, but he has also written about many other tech topics as well. Read his full bio here.