Have you ever received a signature from someone that included information about them, such as a phone number, address, or maybe a link to their company or social media profile? Chances are good that they aren’t typing that at the end of every email they send, and that it is a signature that is automatically generated. For example, Outlook lets you add signatures to your emails, and even makes it possible to include picture. Many email providers and applications offer their users the option to create and use an email signature, and Gmail is no different. Our guide below will show you where to find the setting for your Gmail account so that you can create your own custom email signature that will be added to the end of every message you send.
How to Create a Gmail Signature
Continue reading for additional information on creating a signature in Gmail, including pictures of these steps.
How to Make an Email Signature in Gmail (Guide with Pictures)
The steps in this email are going to show you how to create a signature that will be added to all of the outgoing email messages that you send from Gmail. Note that this will only apply to emails that you create and send through the Web-browser version of Gmail. Emails sent from another application, such as the Mail app on your iPhone or Outlook will use any signatures that are defined in those applications instead.
Step 1: Go to https://mail.google.com and sign into your Gmail account.
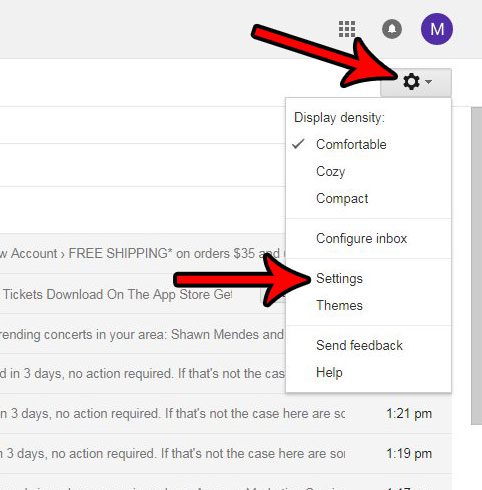
Step 2: Click the gear icon at the top-right of the window, then click the Settings option.
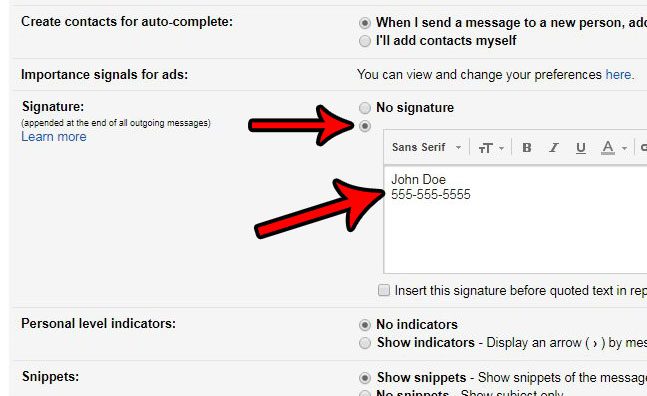
Step 3: Scroll down to the Signature section, click the circle to the left of the text box, then enter the content for your signature.
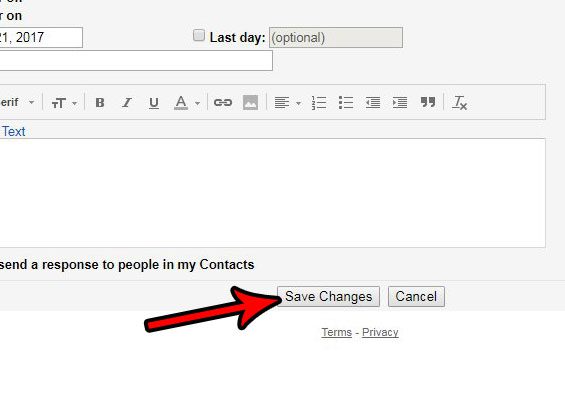
Step 4: Scroll to the bottom of the menu and click the Save changes button.
In Step 3 above, you will notice that there is a bar of options above the signature text box. You can use these tools to format the text, add things like links, pictures, and lists. There’s also a button to remove formatting, if you find that your signature doesn’t look right on other people’s email clients.
How to Create a Gmail Signature in the iPhone Mail App
While the steps above will allow you to create a signature for emails that you send through the browser, it won’t affect emails that you send from the Mail app on your iPhone. You can create a signature in Gmail on your iPhone with the following steps. If you would like to use a signature when you send email from your iPhone, then this article will show you additional information, as well as pictures for the steps. Note that if you have multiple email accounts on your device that you can create separate signatures for all of those accounts.
Additional Sources
After receiving his Bachelor’s and Master’s degrees in Computer Science he spent several years working in IT management for small businesses. However, he now works full time writing content online and creating websites. His main writing topics include iPhones, Microsoft Office, Google Apps, Android, and Photoshop, but he has also written about many other tech topics as well. Read his full bio here.
You may opt out at any time. Read our Privacy Policy