Fortunately the iPad has a special Restrictions menu that you can adjust to disable or remove certain features and functionality from the device. One of the features that you can disable is FaceTime. Our guide below will show you how to find and use the Restrictions menu to prevent FaceTime from being used on the iPad.
How to Use Restrictions to Turn Off FaceTime on an iPad
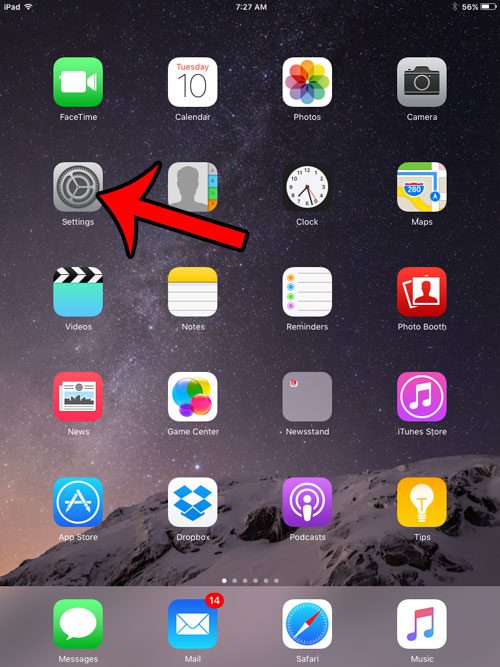
The steps in the guide below were performed on an iPad 2, in iOS 9.3. These steps will assume that Restrictions are not currently enabled on your iPad. If you are disabling FaceTime on a child’s iPad, then you should take a look around at the other options on this menu, as you can also block certain websites, and prevent the purchase of apps or in-app purchases. Step 1: Tap the Settings icon.
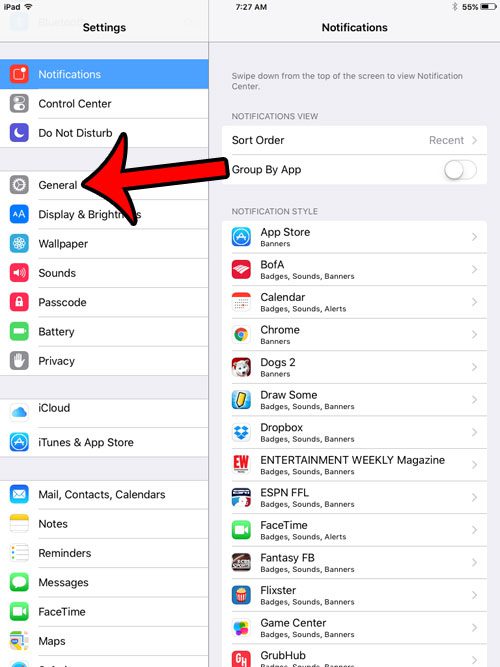
Step 2: Tap the General option in the column at the left side of the screen.
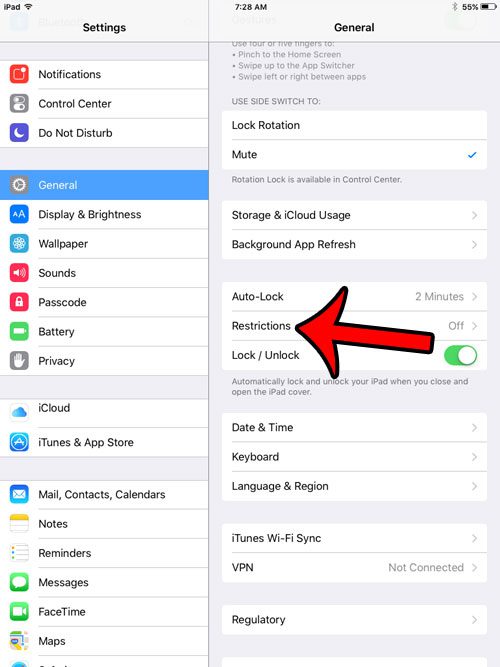
Step 3: Select the Restrictions option in the column at the right side of the screen.
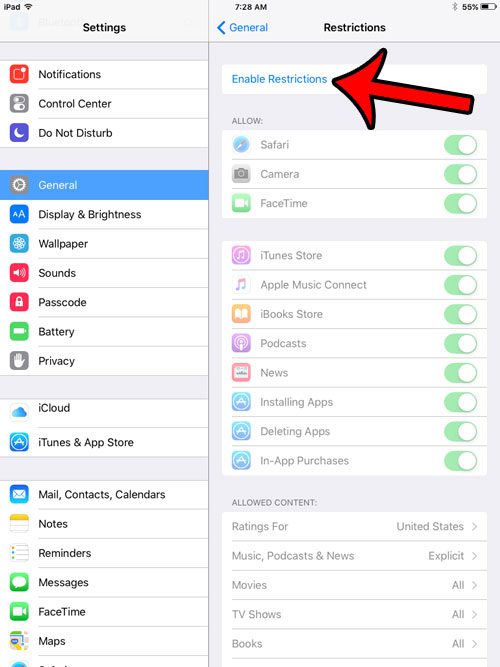
Step 4: Tap the Enable Restrictions button at the top of the screen.
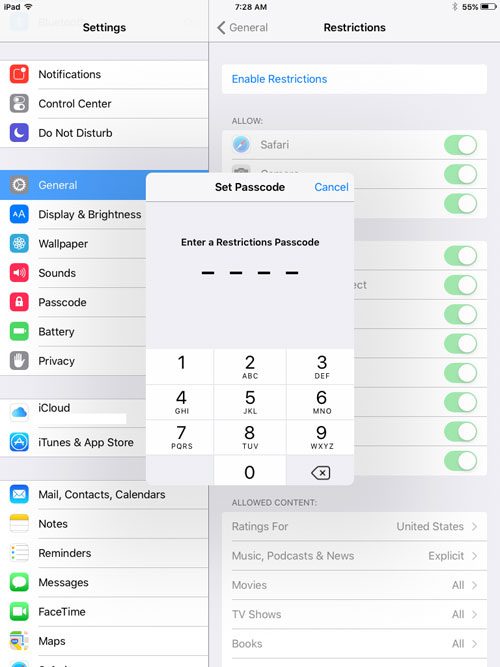
Step 5: Enter a passcode that you will need to use to access the Restrictions menu in the future.
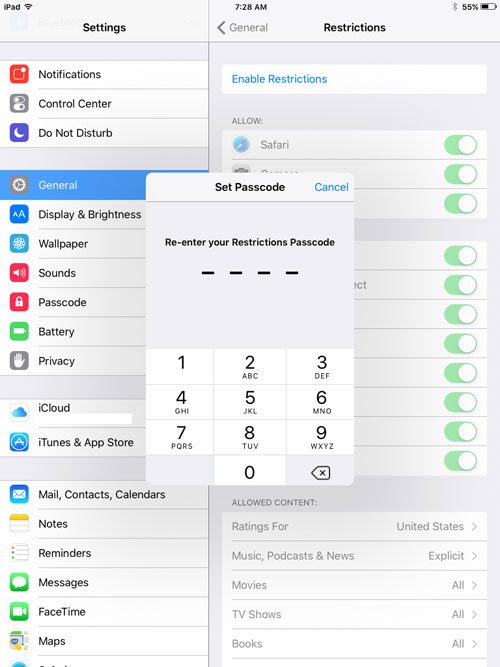
Step 6: Re-enter the passcode to confirm it.
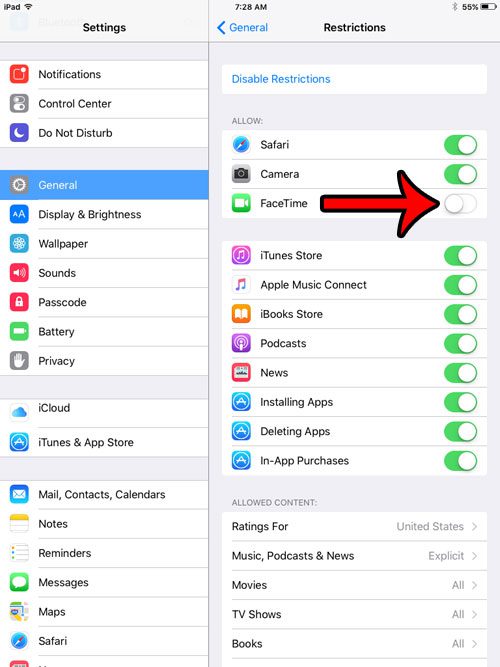
Step 7: Tap the button to the right of FaceTime to turn it off. Note that this will remove the FaceTime app icon from the Home screen, as well as the FaceTime option from the Settings menu.
Do you find the passcode on your iPad to be more trouble than it’s worth? Learn how to turn the passcode off on your iPad so that you can skip the step where you would need to enter it. After receiving his Bachelor’s and Master’s degrees in Computer Science he spent several years working in IT management for small businesses. However, he now works full time writing content online and creating websites. His main writing topics include iPhones, Microsoft Office, Google Apps, Android, and Photoshop, but he has also written about many other tech topics as well. Read his full bio here.
You may opt out at any time. Read our Privacy Policy
