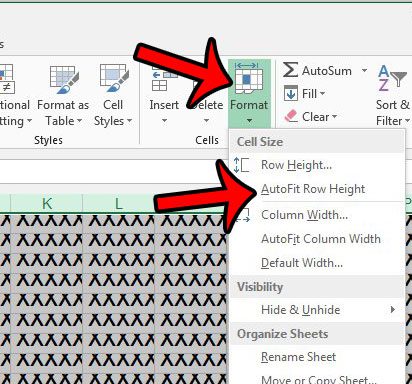
Many of the formatting changes that you can use in Excel are visible on one of the tabs in the navigational ribbon. Occasionally these tools will have options that specifically apply to an entire worksheet, but many only apply to the current selection. So if you need to know how to expand all of your rows in Excel, you may be looking for a way to do so. In Excel, expand rows by selecting all the rows, clicking the Home tab, choosing Format, then selecting the AutoFit Row Height option. If you have multiple lines of text in a cell in your spreadsheet, then you may have noticed that Excel 2013 may not be displaying all of it. You might already know how to change row height in Excel 2013, but it can be tedious to do that for every row that needs adjustment. Fortunately, you can expand the row height of every row in your spreadsheet, and there are a couple of different ways to do so. You can manually set the height for every row, or you can elect to have Excel automatically fit your row height to your data. If you would like to group your rows so that you can selectively expand and collapse groups of them, click here to jump to that section of this article.
How to Expand Rows in Excel
Our article continues below with additional information on expanding rows in Excel including pictures of these steps and additional ways to expand them. Want your columns to all be the same size? Our how to adjust all column width in Excel tutorial can show you how to do it.
How to Make All Rows Bigger in Excel 2013 (Guide with Pictures)
The steps in this article will show you how to manually adjust the row height of every row in your Excel 2013 spreadsheet, as well as show you how to automatically adjust your row heights to display the content in the cells. Note that these steps are meant to change row height, but you can follow very similar steps to adjust column width in Excel 2013. If you like to use keyboard shortcuts in Excel, then our Excel AutoFit column width shortcut guide will show you how to perform that action.
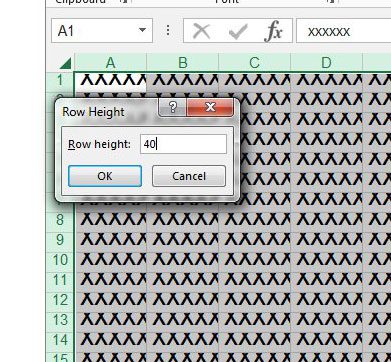
How to Manually Adjust All Row Heights in Excel 2013
How to Automatically Adjust Row Height in Excel 2013
How to Group Rows in Excel
This method provides you with another way to expand or collapse certain parts of your spreadsheet. Note that the rows in a group must all be consecutive. Note that when you group rows manually like this you can choose to include blank rows in your group data, if you would like. if you are grouping rows and each particular group is pretty small, then it can make it a little easier to expand rows or collapse rows when the entire Microsoft Excel grouping system is completed.
Step 1: Click on the first row number that you wish to include in your group.
Step 2: Hold down the Shift key, then click the last row number to include in the group.
Note that you can also group columns like this, too.
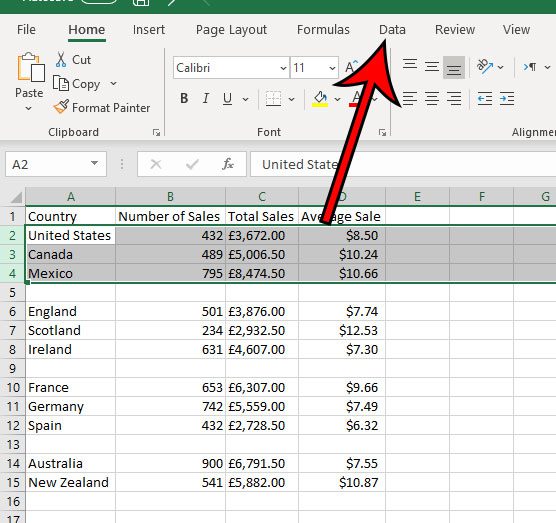
Step 3: Click the Data tab at the top of the window.
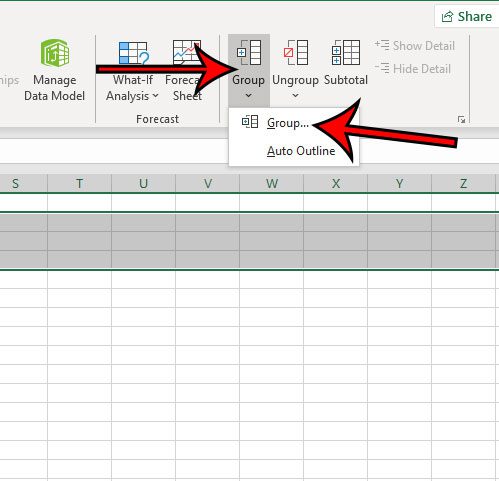
Step 4: Click the Group button in the Outline section of the ribbon, then click the Group button.
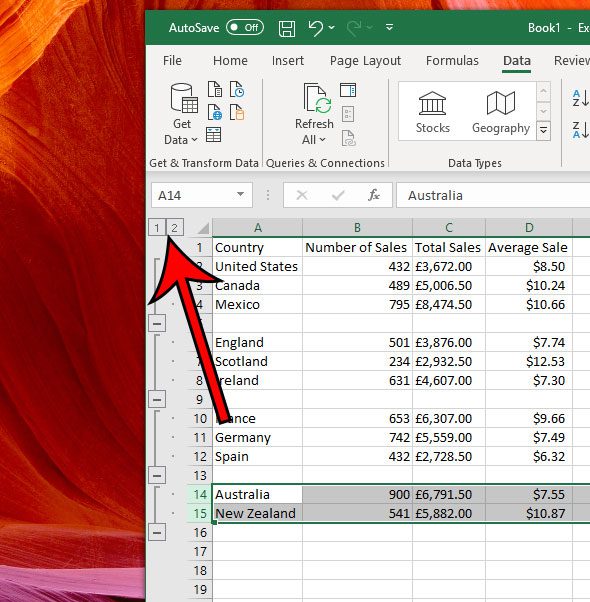
Step 5: Click the – button to the left of the row numbers to collapse a grouped row, then click the + symbol to expand them.
If you are having trouble finding these icons, they are at the top left corner of the spreadsheet. This is one of the best methods when you are learning how to expand all rows in Excel, as grouping data in an Excel spreadsheet has a number of different uses.
How to Expand or Collapse All Groups in Excel
Note that there is a small number 1 and 2 above the section with the + and – symbols. Clicking on the 1 will collapse every group, while clicking on the 2 will expand every group. Our tutorial continues below with additional discussion about expandable rows in Excel. Do the row numbers on the left side of your sheet skip a few numbers? Learn how to unhide rows in Excel 2013 to see everything that is part of your spreadsheet. For example, if you want to autofit column width, then you could select multiple columns, click the Home tab, choose Format, then Autofit Column Width. If you grouped columns using the steps outlined above and clicked the minus sign button to collapse columns, then you simply need to click the plus sign button to expand those columns. Since many people will choose to hide rows or columns when they are trying to fit data to page when printing, the need for the Excel “expand all columns” process can be just as common as needing to know how to expand excel rows. But there is a limit to the number of rows and columns that Excel can handle. These limits are:– Excel maximum number of rows – 1,048,576– Excel maximum number of columns – 16,384 These limits have been in place since Microsoft Excel 2007, and are the same all the way up to Microsoft Excel for Office 365.
Additional Sources
After receiving his Bachelor’s and Master’s degrees in Computer Science he spent several years working in IT management for small businesses. However, he now works full time writing content online and creating websites. His main writing topics include iPhones, Microsoft Office, Google Apps, Android, and Photoshop, but he has also written about many other tech topics as well. Read his full bio here.
You may opt out at any time. Read our Privacy Policy