Insert Page Numbers at the Bottom of the Page in Excel 2010
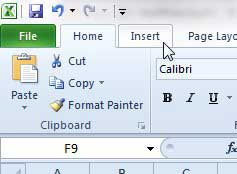
My personal preference is to put the Excel page numbers at the bottom, so this tutorial will focus on that location. Note, however, that you have the option of placing them in almost any other location on the page. I just prefer the bottom because the page number isn’t distracting there, but it’s a matter of personal preference. Step 1: Open the spreadsheet to which you want to add page numbers. Step 2: Click the Insert tab at the top of the window.
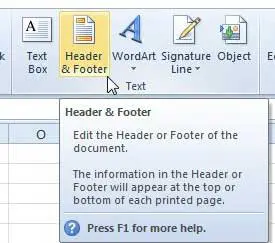
Step 3: Click the Header & Footer button in the Text section of the ribbon.
Step 4: Scroll to the bottom of the page, then click the footer section to which you want to add the page number. Note that I am selecting the right footer.
Step 5: Click the Header & Footer Tools Design tab at the top of the window.
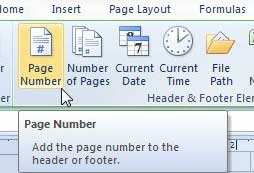
Step 6: Click the Page Number button.
If you open the Print window, you will see that the page number is now visible on each of the pages of your spreadsheet.
If you want to add page numbers as well as a total number of pages, such as “3 of 4”, then you can change the value in the footer section so that it says &[Page] of &[Pages], which will result in the layout below.
If you do a lot of work at both home and the office, a USB flash drive can be a really helpful tool to have. Click here to check out pricing on an affordable 32 GB flash drive. Learn how to print the top row on every page in Excel 2010 for another way to organize your printed spreadsheets. After receiving his Bachelor’s and Master’s degrees in Computer Science he spent several years working in IT management for small businesses. However, he now works full time writing content online and creating websites. His main writing topics include iPhones, Microsoft Office, Google Apps, Android, and Photoshop, but he has also written about many other tech topics as well. Read his full bio here.
You may opt out at any time. Read our Privacy Policy
