While the steps in this article can show you how to control the data that you print in a spreadsheet, you may want to check out our tutorial on Excel not printing all rows if you are having that problem with a spreadsheet.
Only Print Certain Rows in Excel 2013
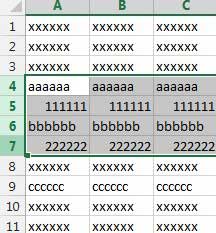
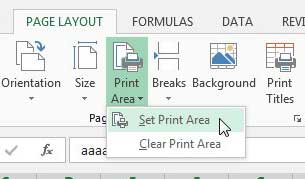
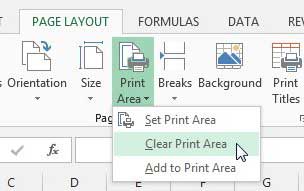
Aside from saving ink and paper, selectively printing certain rows will make it easier for your spreadsheet’s readers to see the important information in your document. So continue below to learn how to set up your spreadsheet. Step 1: Open the spreadsheet in Excel 2013. Step 2: Click the Page Layout tab at the top of the window. Step 3: Click on the top-most row that you want to print, then drag your mouse down until the desired rows are selected. Step 4: Click the Print Area button in the Page Setup section of the ribbon, then select Set Print Area. Now when you open the Print menu, the preview will only show the rows that you just selected. To undo this setting so that you can print the entire spreadsheet, click Print Area again, then click Clear Print Area. If you want to print specific rows that are not next to each other, then you have a couple of options. Option 1 – Hold down the Ctrl key on your keyboard and click each row individually. Note, however, that this will result in each row being printed on its’ own individual page, which may not be what you are looking for. Option 2 – Hide all of the rows that are in between the rows that you want to print, then follow steps 1-4 above to set the print area. You can hide a row by right-clicking on the row number, then selecting the Hide option. Once you have finished printing, you can then select the visible rows that surround the hidden rows, right-click on the selection, and click Unhide. If you are working on important documents on your computer, or if you have files that you can’t afford to lose, then it’s a good idea to have a backup plan. A simple way to do this is to purchase an external hard drive to store your backup copies. You can even use a program like CrashPlan to automatically back up your files for free. For additional ways to customize your printed spreadsheet, consider this article about repeating the top row on every printed page in Excel 2013. After receiving his Bachelor’s and Master’s degrees in Computer Science he spent several years working in IT management for small businesses. However, he now works full time writing content online and creating websites. His main writing topics include iPhones, Microsoft Office, Google Apps, Android, and Photoshop, but he has also written about many other tech topics as well. Read his full bio here.
You may opt out at any time. Read our Privacy Policy