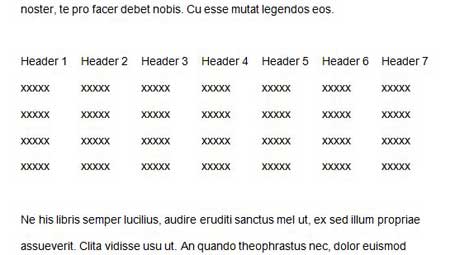
These borders can be useful in providing some visual separation of the data that you have entered into those cells. But the needs of your document might not require table borders, which can leave you looking for a way to eliminate them. Our tutorial below will show you how to remove table lines in Word documents.
How to Get Rid of Table Borders in Word Documents
Our guide continues below with additional information on how to remove borders from a table in Word, including pictures of these steps. Word processing applications like the Microsoft Office version, Word, or the Google Apps version, Docs, allow you to add various objects to your document to help you convey information to your readers. One such object is a table, and you can specify the number of rows and columns included in that table. But you can also format a table in Word by adjusting the appearance of the table border. You can even remove the table borders in Microsoft Word if you don’t like how they look. Borders on a table in Word 2010 can be helpful for keeping information organized for the person reading your document. But they can be distracting or ugly, depending upon the styling of the rest of your document. You may have discovered how to remove the borders from an individual cell of your table, but are struggling to delete all of the borders at once. Fortunately, this is something that you can accomplish with your Word 2010 document, allowing you to quickly remove all of your table borders at once so that your table information prints without those visible lines. In some situations, you may want to have your text appear in the middle of the page. Our how to center text in Word tutorial can show you how to do that.
How to Remove Table Lines in Word 2010 (Guide with Pictures)
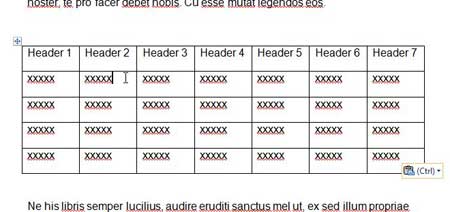
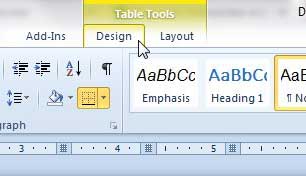
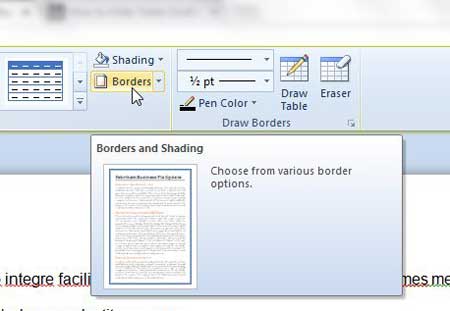
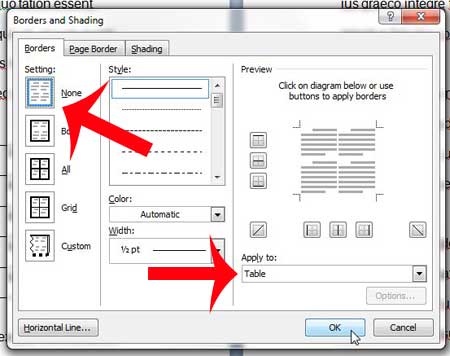
This tutorial will assume that you already have a Word document containing a table. The steps below will remove the borders from that table so that they are gone when you print the document. You will still see blue gridlines on your screen to identify the borders of the table. You can read this article to learn how to remove those as well. You can then navigate to the Print Preview window and see how your table will look now that it is set to print without borders. If you click the arrow to the right of the Borders dropdown menu then you can also see some different border style options as well.
Now that you know how to remove table lines in Word you will be able to use this whenever you want to get rid of the borders in a table in your document, or even if you want to change something about the style of your table borders.
More Information on How to Remove Table Borders in Word 2010
Removing the borders from a table in a Microsoft Word document will only remove the lines that signify the borders. They are still technically there, even if you can’t see them. This means that data that you add to cells in your table will still respect the row and column boundaries of that table. If you are trying to create one big “cell” then you may want to try using a text box from the Insert menu, or use a single-cell table instead. You can do this by adding a table that is only one row by one column. As you add content to that cell it will expand to accommodate the content, allowing that one cell to become quite large. There are some other border options available for Microsoft Word tables as well. The options include:
BoxAllGridCustomNone
If you don’t want to remove the table borders entirely then you may try one of those options instead to see if it produces the desired result. A table in Microsoft Word can look very different when you adjust the table gridlines or the way that your table cells look. Even if you don’t want the full set of lines on your horizontal and vertical rows if can be useful to format borders for the table so that you have black borders going around the perimeter of the whole table to separate it from the rest of the document content. If you choose “None” then this border option will remove gridlines from the table entirely. If you select “Box” then this option will only show the outside borders of the table Another interesting thing that you can try is setting the color of the table border to white, or whatever the page background color is in your document. You can change the table border color in Word from the Borders and Shading dialog box that we used in the steps above, but click the Color drop down menu instead and choose the color that matches the document background. After you erase table lines in Word you may not like the way that it makes your table look. Fortunately you can always go back to the Borders and Shading window and choose a different table border setting to restore the lines to the table. These same steps will work in most newer versions of Microsoft Word as well. In some versions, however, you will be selecting the Table Design tab rather than the Design tab. If you want to reduce the number of sheets on which your document is printed, you can learn how to print two pages on one sheet in Word 2010.
Additional Sources
If you place your mouse pointer inside one of the table cells you can select the Layout option in the menu bar at the top of the window. You can then click the Delete button, and choose the Delete Table option to remove the table and its contents. If you click and drag when you see this icon you will be able to make the column smaller or larger. You can then click the Table button, and choose the number of rows and columns for the table.
After receiving his Bachelor’s and Master’s degrees in Computer Science he spent several years working in IT management for small businesses. However, he now works full time writing content online and creating websites. His main writing topics include iPhones, Microsoft Office, Google Apps, Android, and Photoshop, but he has also written about many other tech topics as well. Read his full bio here.
You may opt out at any time. Read our Privacy Policy
