Occasionally, however, you may encounter a situation where you need to reduce the file size as you make the picture smaller, or you are trying to use the picture someplace, like a website, where you don’t have those image editing tools. Fortunately, your Windows laptop or desktop computer includes a tool called Microsoft Paint that provides you with a number of different options for editing pictures. Our tutorial below will show you how to resize an image in Paint.
How to Resize Image in Paint in Pixels
Our guide continues below with additional information on resizing a picture in Paint, including pictures of these steps. The pictures that you want to use in a document or a spreadsheet are rarely the correct dimensions by default. Many of these applications have their own picture editing utilities, however, so you can usually click and drag on a corner or side of the picture to make it the correct size. Occasionally you will need to have a picture in a specific pixel dimension, which isn’t something that you can accomplish with just the tools in Microsoft Word when you need to use that picture on a website or when you upload it somewhere. You can resize a picture in Microsoft paint by clicking the Resize button, choosing the Percentage or Pixels options, entering the desired values, then clicking OK. Once you become familiar with the options in the Microsoft Paint application you can take advantage of them to perform many of the basic image editing tasks that you may have otherwise thought would require a more expensive application like Adobe Photoshop. This guide is going to show you how to change the size of a picture using the free Microsoft Paint application included with your copy of Windows 10. We cover the steps briefly at the start of this article, then go into more depth later.
How to Make a Picture Larger or Smaller in Microsoft Paint (Guide with Pictures)
The steps in this article use the default Paint application in Windows 10. Note that resizing an image will change that copy of the image on your computer, so you may wish to create a copy of the image file first if you want to keep the original. You can create a copy of an image by right-clicking the image file and selecting Copy, then right-clicking on the desktop or in the same folder and choosing the Paste option.
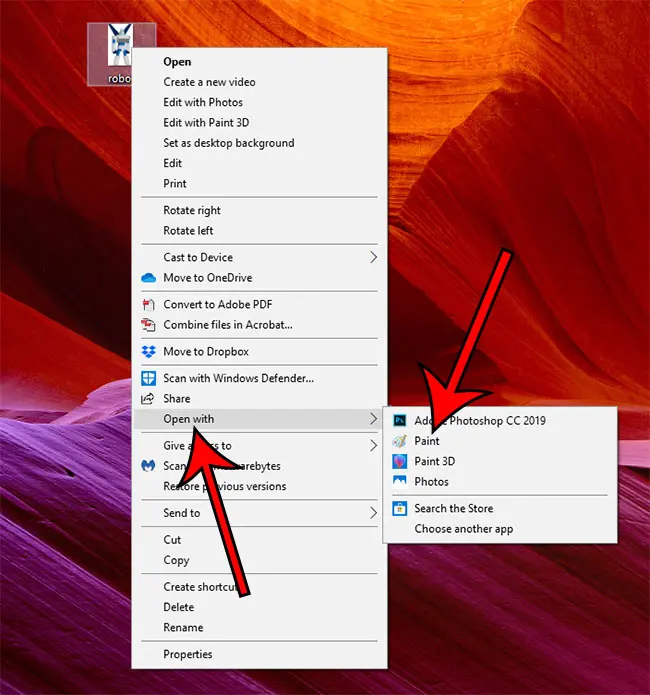
Step 1: Right-click the picture, select the Open with option, then choose Paint.
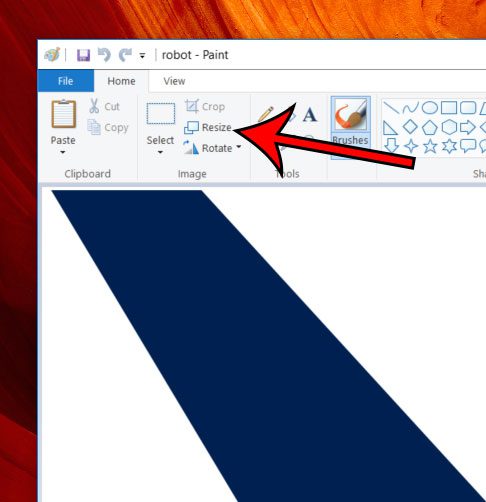
Step 2: Click the Resize button at the top of the window.
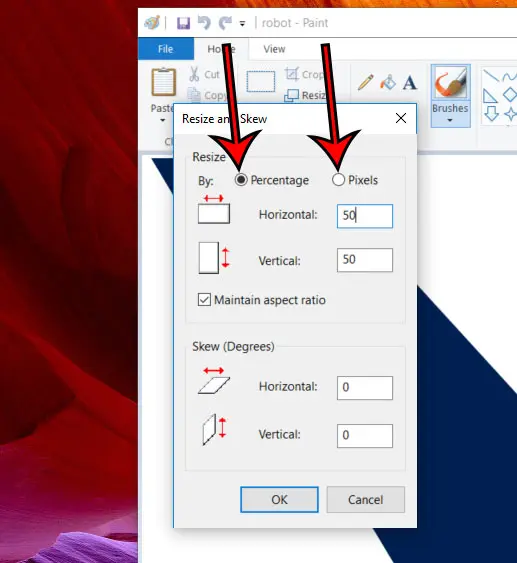
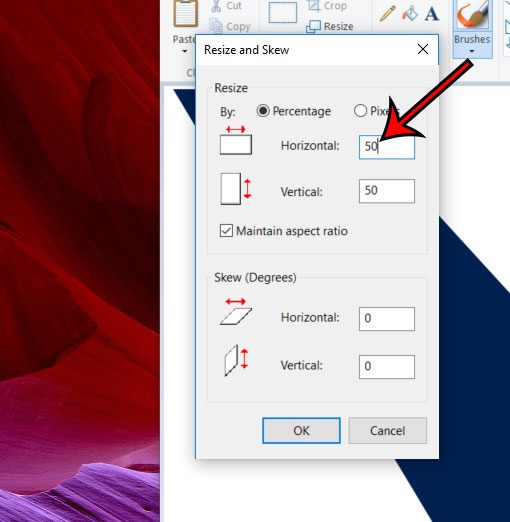
Step 3: Click the Percentage option if you wish to resize by a percentage of the image, or select the Pixels option if you want to make the height or width of the picture a specific number of pixels.
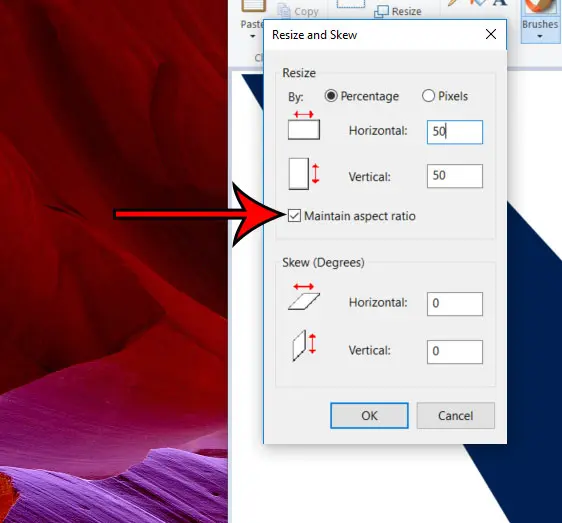
Step 4: Check the box to the left of Maintain aspect ratio if you want the picture to scale properly as you resize it.
You only want to scale the image without maintaining the aspect ratio if you intend to distort the image.
Step 5: Enter the desired value into the Horizontal or Vertical field. If you elected to maintain aspect ratio, then the other value will adjust as well.
Step 6: Click the OK button when you’re finished.
Be sure to save the image when you’re done if you want to keep this resized version of the image file. Our tutorial continues with additional discussion on Microsoft Paint resizing tools.
More Information on How to Change Aspect Ratio on Image in Paint
One of the reasons that someone could turn to Microsoft Paint is if they have a low resolution image and need to make it bigger. While you can technically accomplish this, it is going to give you a pixelated image that doesn’t look very good. This pixelation is less noticeable if the degree of the upscaling is not very high, but you will definitely notice it if you take a picture that is, for example, 100 pixels wide and you try to make it 2000 pixels wide. While Microsoft Paint does make it easy to resize images, it’s important to remember that when you make an adjustment to your picture, even if it’s just a cropped image, will replace the original image when you save it. This is why I typically make it a habit to immediately save my resized image with a new filename before I even make adjustments. Saving in MS Paint works the same as in other Microsoft programs like Microsoft Word or Microsoft Excel, so it should be a familiar interface. I often add something to the end of the original filename, like the width or purpose of the new image. If you also have Microsoft Word, there are some interesting things you can do with images in that application as well. For example, find out how to save a picture in a Word document as a separate image file if you would like to use it in another application. Make a copy of the image file first if you wish to keep a copy of the original, unaltered picture. You can copy a picture by right-clicking the file and choosing Copy, then right-clicking on an empty space in the folder and choosing Paste.
Additional Sources
You can choose whichever of those options you would like to use to change the size of your image. If you don’t have that option checked and you only adjust the height or width of the picture, then the other dimension will remain at its original value, which can warp the image. To maintain the current aspect ratio you will either need to use the Maintain Aspect Ratio option, or you will need to update the height and the width accordingly. You can do this by installing a Microsoft application called PowerToys, which you can download here. Once you have downloaded and installed that application you can open the PowerToys application and enable the Image resizer option in the left column. Once that is activated you will be able to use the right-click mouse button on a file (or multiple files) in File Explorer, then choose the Image Resizer option from the menu. A quick way to do this is to right-click on the image file, choose the Copy option, then right-click in an empty space of the File Explorer and choose the Paste option. You can then open the copy in Microsoft Paint and use the crop tool to crop an image, or use the other editing tools to change the copy of the image without affecting the original copy of the photo. You can also click the Undo arrow at the top of the Paint window.
After receiving his Bachelor’s and Master’s degrees in Computer Science he spent several years working in IT management for small businesses. However, he now works full time writing content online and creating websites. His main writing topics include iPhones, Microsoft Office, Google Apps, Android, and Photoshop, but he has also written about many other tech topics as well. Read his full bio here.
You may opt out at any time. Read our Privacy Policy