Since Microsoft Word is still one of the most popular ways that you could create a document, that makes it likely that you will need to know how to set 1 inch margins in Word. If you are in high school or college, then you have probably had to write a lengthy paper in Word 2010. Your teacher or professor probably also has a format that they prefer for these documents, and one of the requirements will usually involve the size of the margins. In most cases this is meant to combat students that attempt to artificially inflate the size of a paper by making small changes to the layout of the document. So continue reading below to learn how to set up 1 inch margins in Microsoft Word 2010.
How to Set 1 Inch Margins in Word 2010
Our article continues below with additional information and pictures for these steps. We also discuss changing your Word settings so that all future new documents will have one inch margins by default. Occasionally you might need to add a sheep to a slide instead of a text box or a picture. Our guide on how to make a circle in Google Slides will show you how.
How to Make 1 Inch Margins in Word 2010 (Guide with Pictures)
Note that you can change the size of your margins at any time while the document is open. The margin change will be applied to every page of your document, so you don’t need to worry about manually adjusting the margins on every page of a multi-page paper.
Step 1: Open Microsoft Word 2010, or double-click your existing Word document to open it in Word 2010.
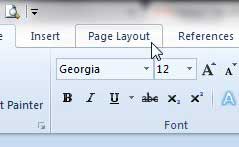
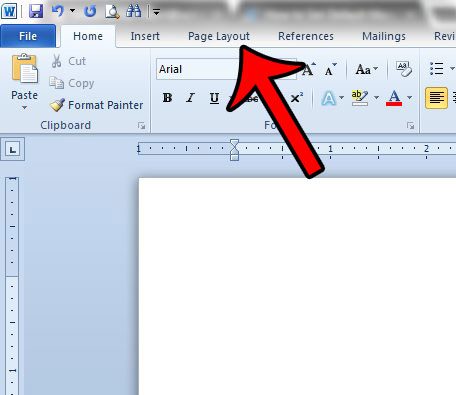
Step 2: Click the Page Layout tab at the top of the window.
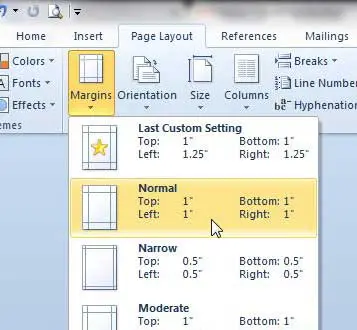
Step 3: Click Margins in the Page Setup section of the window, then click the Normal option.
Since this is a very common document layout, Microsoft has provided an easy way to set it up. But if you need to set up your document so that the margins are 1 inch on just some of the sides, but not all of them, then you need to use custom page margins. You can read this article to learn more about custom page margins. You can also change the margins in your document by adjusting the guides that appear on the ruler at the top and left of the document. If you don’t see the ruler then you can display it from the View tab.
How to Set 1 Inch Margins as the Default in Word 2010
If every document that you create in Word 2010 requires 1-inch margins, then it might be easier to set those as the default page margins for every new document that you create. You can do this by following these steps.
Step 1: Click the Page Layout tab at the top of the window.
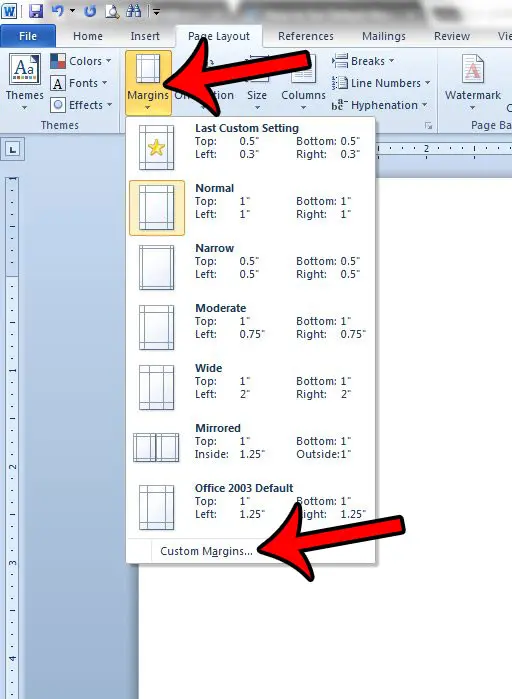
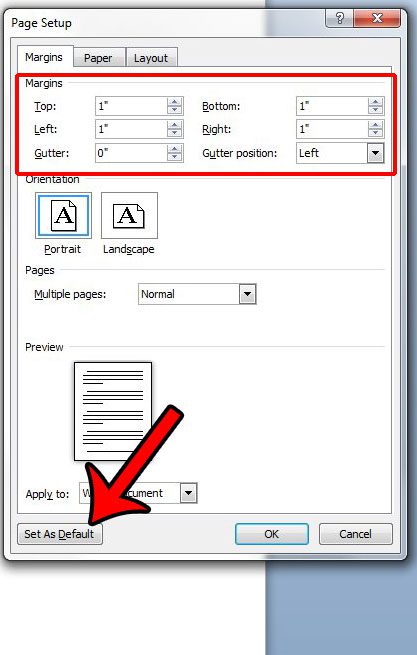
Step 2: Click the Margins button, then click Custom Margins at the bottom of the list.
Step 3: Confirm that the current margin settings are what you wish to use as the defaults, then click the Set As Default button at the bottom of the window.
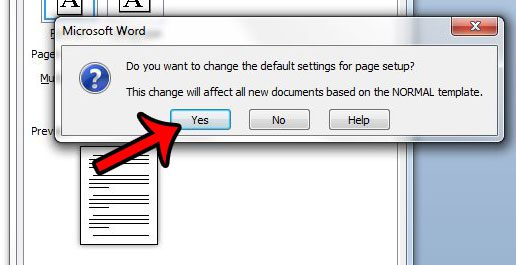
Step 4: Click the Yes button to confirm that you wish to change the default settings.
This setting will be applied to each new document that you create which uses the Normal template. Existing documents, or documents that you receive from others, will not use your default settings.
Quick summary – How to set one inch margins in Word 2010 by default
If you’re setting up a research paper to turn in for school, then you might also be interested in learning how to remove the page number from your title page. Click here to learn how. Read this article to change your margins from inches to centimeters in Word 2010. After receiving his Bachelor’s and Master’s degrees in Computer Science he spent several years working in IT management for small businesses. However, he now works full time writing content online and creating websites. His main writing topics include iPhones, Microsoft Office, Google Apps, Android, and Photoshop, but he has also written about many other tech topics as well. Read his full bio here.
You may opt out at any time. Read our Privacy Policy
