Wireless Setup for the Brother HL2270DW
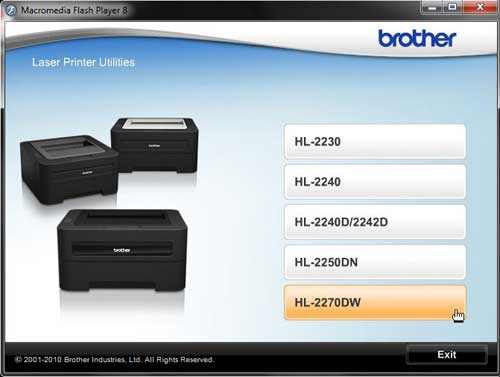
The first thing to clarify when you are performing the wireless setup for this device is that your computer does not need to have wireless capabilities. It simply needs to be connected to a network that has a wireless element. For example, I currently have this printer wirelessly connected to my desktop computer. The desktop computer does not have a wireless network card, but is connected to my wireless router using an ethernet cable. The next point of clarification is that you will need a USB printer cable for the initial wireless setup of this device. Since the printer does not have a way for you to manually input the settings for the wireless network you will need to apply them to the printer from the computer. Brother also does not include a USB cable with the printer, so you will either need to purchase one or, preferably, use the cable that was connecting your old, wired printer to your computer. Begin the setup process by unpacking the printer from its’ packaging materials, then removing all of the stickers on the printer. The toner cartridge is already in the printer, but you should take it out and shake it to reposition the toner inside. Replace the cartridge, then close the access door. Connect the power cable to the back of the printer, then plug it in. Do NOT connect the USB cable yet. You will be prompted to do that later. Turn on the printer, wait for it to boot up, then press the Go button on the top of the printer to print a test page. Insert the Brother installation disc into the disc drive on your computer, then click the Setup.exe option in the AutoPlay window. If you do not have a disc drive or you have misplaced the installation disc, you can download the driver software from here. Click the HL-2270DW button at the bottom of the window.
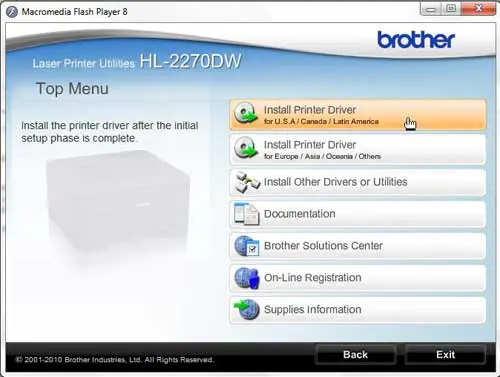
Click your preferred language from the list. Click the Installed Printer Driver button at the top of the window. Click the Yes button to allow this program to make changes to your computer.
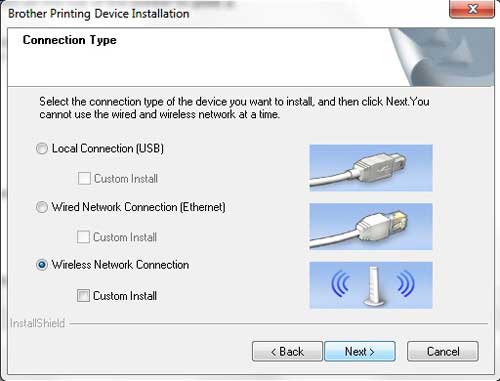
Click the Yes button to accept the license agreement, click the Wireless Connection option, then click the Next button.
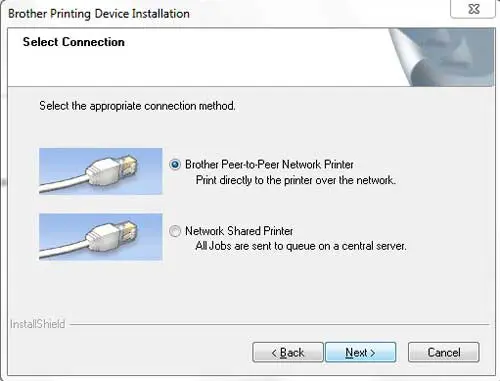
Check the Brother Peer-to-Peer Network Printer option, then click the Next button.
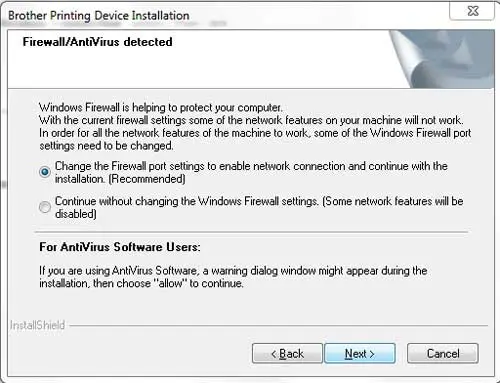
Choose the option to Change the Firewall port settings to enable network connection and continue with the installation, then click the Next button.
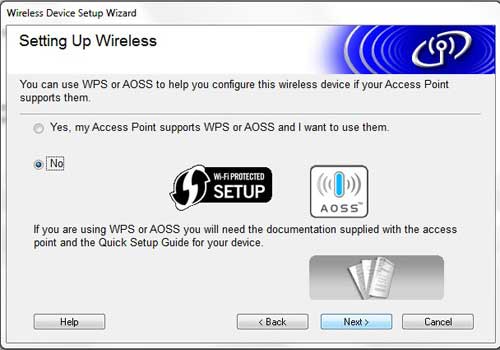
Click the Wireless Setup option at the bottom of the window. Note that when installing this printer on future computers, your printer will appear on this screen and you will select it from the list. Click the No option at the center of the next window, then click Next.
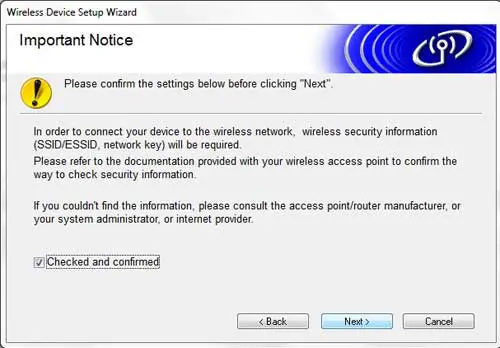
Check the box to the left of Checked and confirmed, then click the Next button.
Check the Temporarily use a USB cable option, then click the Next button. Connect the USB cable from the back of your printer to your computer, then wait for the computer to recognize the printer. Click your Brother HL2270DW printer fro the list of available devices, then click the Next button. Click your wireless network from the list, then click Next. Type your password into the Network Key field, retype it into the Confirm Network Key field, then click the Next button. Click Next, click Next again, then click Finish to complete the setup. You can then disconnect the USB cable when prompted. After receiving his Bachelor’s and Master’s degrees in Computer Science he spent several years working in IT management for small businesses. However, he now works full time writing content online and creating websites. His main writing topics include iPhones, Microsoft Office, Google Apps, Android, and Photoshop, but he has also written about many other tech topics as well. Read his full bio here.
You may opt out at any time. Read our Privacy Policy
