If you are new to Excel, or if you are only familiar with the Windows version of the program, then you might be having difficulty figuring out where to go to switch the orientation of your spreadsheet. So follow our short guide below to learn how.
Switch from Portrait to Landscape in Excel 2011
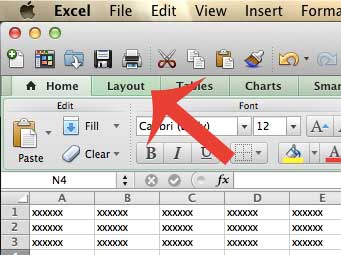
Following our steps below will change the layout of your Excel 2011 spreadsheet from portrait to landscape. This will affect how the spreadsheet is printed by anyone that prints from the file. Be sure to save your file after you make these changes, however, or the file will be set to portrait orientation the next time you open it. Step 1: Open the file in Excel 2011 that you want to switch to landscape orientation. Step 2: Click the green Layout tab above the navigational ribbon.
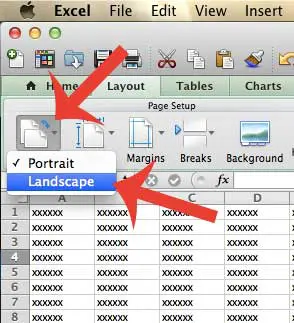
Step 3: Click the Orientation button at the left side of the navigational ribbon, then click the Landscape option.
Do you have a large spreadsheet that you are having trouble editing as you scroll further down your page? Learn how to freeze the top row in Excel 2011 so that you can always view the column headers as you scroll. After receiving his Bachelor’s and Master’s degrees in Computer Science he spent several years working in IT management for small businesses. However, he now works full time writing content online and creating websites. His main writing topics include iPhones, Microsoft Office, Google Apps, Android, and Photoshop, but he has also written about many other tech topics as well. Read his full bio here.