Microsoft Word is an extraordinarily popular software choice for creating documents, but it is largely used as a means for putting ink to paper to create a digital representation of the thoughts in your head. Few people give consideration to the visual appeal of their Word documents, and even fewer consider page borders for Microsoft Word documents as an option for adding some visual appeal to their writings. However, by adding page borders for Microsoft Word documents, you can make your document stand out among other choices that only contain black text on white paper, which can mean the difference between that document being read or simply overlooked.
Page Border in Word 2010- How to Add One (Quick Summary)
There is a very minor change to this procedure in some newer versions of Word, which we will outline in the next section.
Page Border in Word for Office 365
You can read below for additional information on adding page borders in Word, as well as some pictures for the steps.
Page Borders for Microsoft Word 2010 Procedure
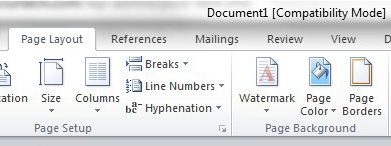
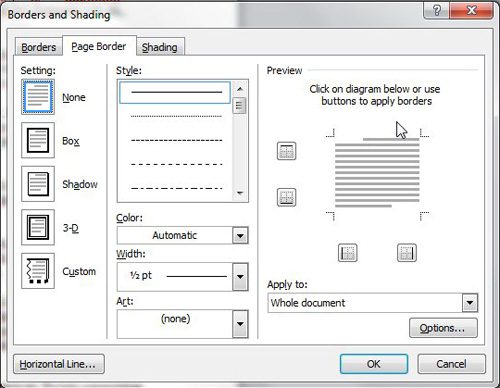
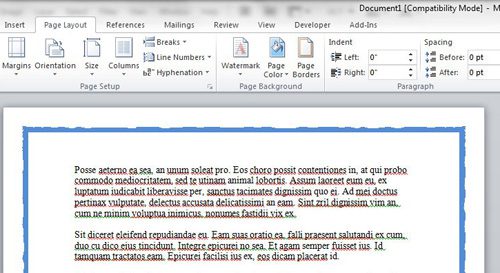
This section goes a little more into depth on the processing of adding a page border in Word. When you’re done with your border, you may want to look into adding a background picture, too, if that’s something you think your document could use. Step 1 – Launch Microsoft Word, then open the document to which you want to add your page borders for Microsoft Word. Note that you can also double-click a Microsoft Word document to automatically open it with Microsoft Word. In Microsoft Word 2010, click the Office button at the top-left corner of the window, click Open, then double-click the file you want to open. Step 2 – Click the Page Layout tab at the top of the window (as mentioned above, you may need to click the Design tab in some newer versions of Word, then click the Page Borders icon in the Page Background section of the ribbon at the top of the window. If your Microsoft Word window size is reduced, then the icon may be eliminated and replaced with a Page Borders text option instead. Either way, clicking the Page Borders option will open a Borders and Shading pop-up window on top of the Microsoft Word window. Step 3 – Click the type of page borders for Microsoft Word option that you want to apply to your document from the selection at the left side of the window. The available options include Box, Shadow, 3-D and Custom. Step 4 – Click the Style, Color, Width and Art options from the center of the window. Note that there are a virtually limitless possibility of combinations that you can use to create page borders for Microsoft Word documents, so don’t settle for your first option. You should be able to find a combination of options that suits your needs. Step 5 – Click the drop-down menu under Apply To: at the right side of the window, then select the portion of your document to which you want to apply these page border settings. For example, you could select the This section – all except first page option if you wanted to apply a page border to every page of your document except the title page. Step 6 (optional) – Click the Options button at the bottom-right corner of the window, then make any adjustments to how the page borders for your Microsoft Word document will be applied in relation to your margins. Step 7 – Click the OK button to apply your page border options to your Microsoft Word document. Now that you have applied page borders for Microsoft Word settings to your document, you are free to apply other visual adjustments to the document as well. In particular, check out the other options on the Page Layout ribbon, such as Themes, Page Setup and Page Background, which offer a variety of other options to compliment page borders for Microsoft Word. You can even change the orientation of the document if you don’t want to keep the portrait option. After receiving his Bachelor’s and Master’s degrees in Computer Science he spent several years working in IT management for small businesses. However, he now works full time writing content online and creating websites. His main writing topics include iPhones, Microsoft Office, Google Apps, Android, and Photoshop, but he has also written about many other tech topics as well. Read his full bio here.
You may opt out at any time. Read our Privacy Policy


