Learning how to remove the “sent from my iPhone” signature from emails on your iPhone is something that most people won’t do until they see it in a reply from someone else. Smartphones are more popular than ever, and there is no longer any stigma attached to emailing someone from your phone. In fact, a significant percentage of all emails are read on mobile phones, and that number is only going to go up. But your iPhone 5 includes a default signature with the phrase “sent from my iPhone.” This signature is going to be attached to any email that you send from your device. Some people may not have a problem with this signature, some people might actually like that it is there, but others would prefer that people not know where an email is coming from. So if you want to remove the default signature from your iPhone 5, or if you want to change it to something different, you can follow the steps outlined below to do so.
How to Remove the Sent from My iPhone Signature on an iPhone
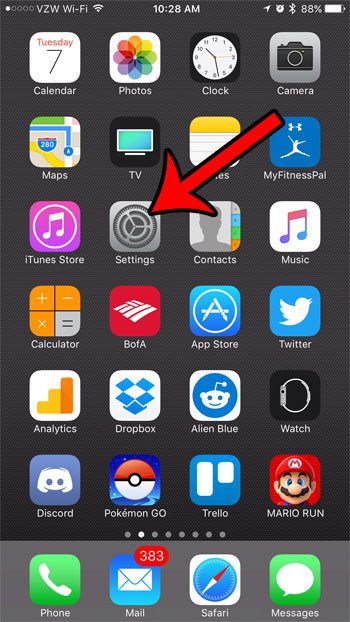
I personally like to have some consistency among the emails that I send to people, and I find the “Sent from my iPhone” signature to be unnecessary for my needs. So it is usually one of the first things that I get rid of whenever I am setting up a new iOS device. The directions below are specific to the iOS 10 operating system, although the process is very similar in earlier versions of iOS. Step 1: Touch the Settings icon.
Step 2: Scroll down and touch the Mail button.
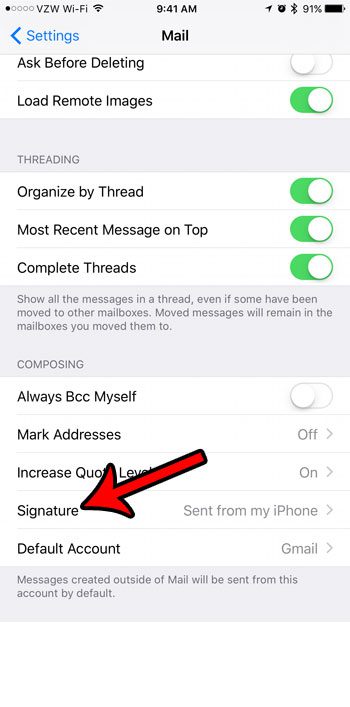
Step 3: Scroll to the bottom of the menu and tap the Signature option.
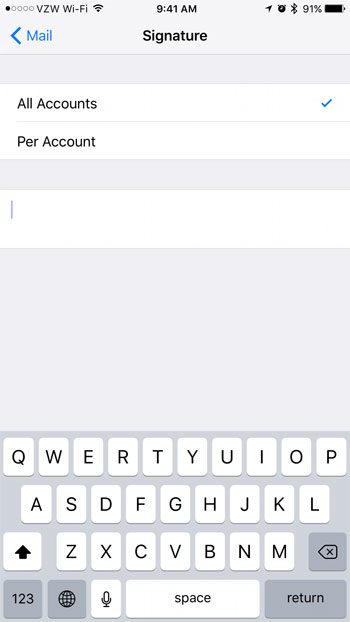
Step 4: Touch the text box containing the “Sent from my iPhone” text, then hold down the Delete button to remove it. You can then exit the menu or replace it with your desired signature.
You will note that there is a Per Account button at the top of this screen, which you can use to set specific signatures if you have multiple email accounts configured on your device. However, if you would prefer to remove sent from my iPhone from all of your email accounts, then you can leave the All Accounts option selected.
One of the best new additions to iOS 7 is the ability to block unwanted callers. You can read this article to learn how to block callers on your iPhone 5 in iOS 7. After receiving his Bachelor’s and Master’s degrees in Computer Science he spent several years working in IT management for small businesses. However, he now works full time writing content online and creating websites. His main writing topics include iPhones, Microsoft Office, Google Apps, Android, and Photoshop, but he has also written about many other tech topics as well. Read his full bio here.
You may opt out at any time. Read our Privacy Policy


