It is very common to need to remove the page number from a title page in Word 2010. Schools and institutions may require documents to be a minimum length, and the sparse content on the title page is usually not counted toward any page goals. Additionally, the page number on the first page can also be visually distracting, and starting your numbering on the second page typically solves many page numbering issues that you encounter. Microsoft Word 2010 provides you with easy access to all of the tools that you might need to write a paper, document or letter. This includes the ability to customize the information that appears in your header or footer, such as a page number. But your customization does not stop there, as Word also provides formatting options to display the page numbers exactly how you want them. For example, if you want to remove the page number from a title page or cover page in Word 2010, you can modify the page number settings to accomplish your goal.
How to Remove Page Number from Title Page or Cover Page in Word 2010
When you are changing the settings for your Word 2010 page numbers, it is important to know exactly how you want them to be formatted. You have almost complete control over how these page numbers are displayed, so it is very easy to inadvertently apply a setting, then not realize how to remove it. For the purposes of numbering a document where you do not display a page number on the title or cover page, however, you really only need to decide whether you want the page numbering to start with “1” or 2″ on the first content page of your document. Follow the steps below to format the page numbers in Word 2010.
- Open the document in Word 2010 to which you want to apply your custom page number settings.
- Click the Insert tab at the top of the window.
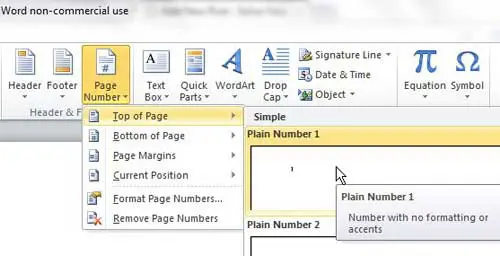
- Click the Page Number drop-down menu in the Header & Footer section of the ribbon, then choose the location on the page where you want to display your page numbers.
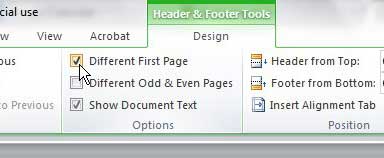
- The ribbon at the top of the window should now be on the Header & Footer Tools Design menu, so check the box to the left of Different First Page in the Options section of the ribbon.
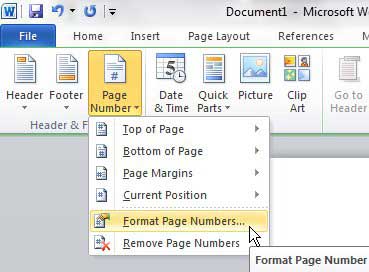
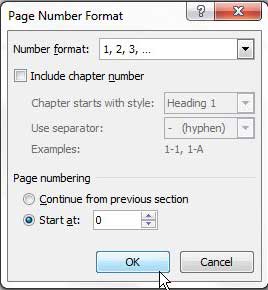
- Click the Page Number drop-down menu in the Header & Footer section at the left side of the ribbon, then click the Format Page Numbers option.
- Click the Start at button under the Page numbering section of the window, then choose 0 if you want the first displayed page number to be 1, or choose 1 if you want the first displayed page number to be 2.
- Click the OK button at the bottom of the window to apply your changes. If the document that you are working with has strict requirements for what appears on the page, then you might also need to add additional information, or even an image or logo, to the top of the page. Learn how to add a picture to a header in Word 2010 if your document requires you to do so.
Summary – how to remove the page number from the first page in Word 2010
Would you like to show more or fewer recent documents in Word 2010? Learn how to increase or decrease the number of Word 2010 recent documents if you would like to make it easier for you to find your documents, or more difficult for someone else to find them.
See also
How to insert a check mark in Microsoft WordHow to do small caps in Microsoft WordHow to center text in Microsoft WordHow to merge cells in Microsoft Word tablesHow to insert a square root symbol in Microsoft Word
After receiving his Bachelor’s and Master’s degrees in Computer Science he spent several years working in IT management for small businesses. However, he now works full time writing content online and creating websites. His main writing topics include iPhones, Microsoft Office, Google Apps, Android, and Photoshop, but he has also written about many other tech topics as well. Read his full bio here.
You may opt out at any time. Read our Privacy Policy
