The steps in the article below will show you how to set a print area in the 2010 version of Excel. The process is very similar in the 2013 version of Excel as well, but you can read here to learn about using print areas in Excel 2013 instead.
Set Print Area from Selection in Excel 2010
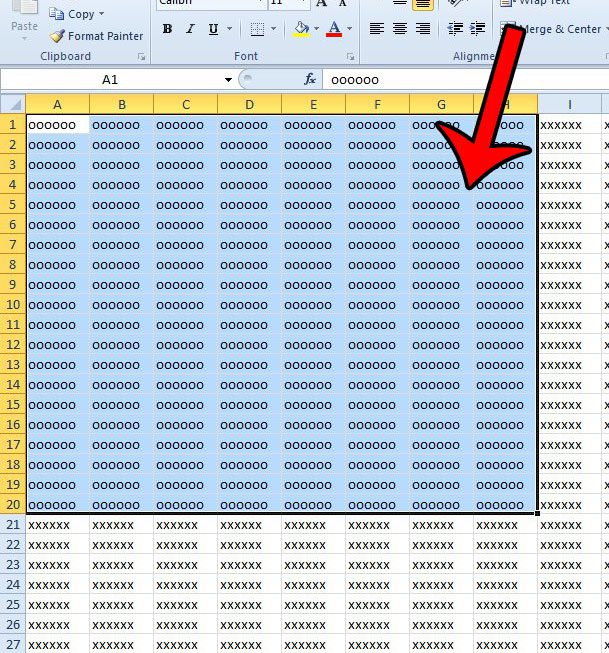
Printing physical copies of spreadsheets may not seem like something that would come up often, but I have found that I end up doing it much more often that not. Either someone has trouble processing data from their screen, or you need to submit a hard copy of something to the accounting department or a colleague. Fortunately there are many options in Excel that allow you to customize the way that your document prints out, including the ability to choose the cells that you want to print. Step 1: Open the spreadsheet in Excel 2010 that contains the cells that you want to select and print. Step 2: Use your mouse to select the cells that you want to print.
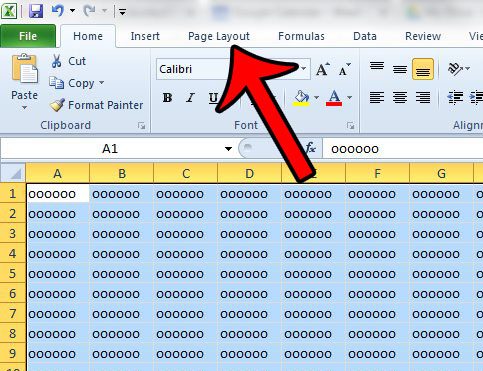
Step 3: Click the Page Layout tab at the top of the window.
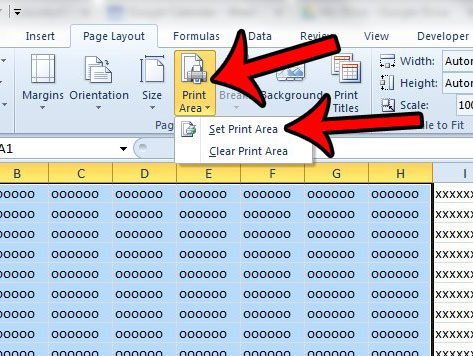
Step 4: Click the Print Area drop-down menu in the Page Setup section of the ribbon at the top of the window, then click the Set Print Area option.
Now when you go to print the document, you should only be printing the area that you just selected. To undo this setting and clear the print area, simply return to the Print Area drop-down menu in Step 4, then click the Clear Print Area option. While setting the print area can solve some of the issues that you encounter printing in Excel, it won’t fix all of them. Check out our Excel printing guide to see some of the other options available to help improve a printed worksheet. After receiving his Bachelor’s and Master’s degrees in Computer Science he spent several years working in IT management for small businesses. However, he now works full time writing content online and creating websites. His main writing topics include iPhones, Microsoft Office, Google Apps, Android, and Photoshop, but he has also written about many other tech topics as well. Read his full bio here.
You may opt out at any time. Read our Privacy Policy


